Get an AD Free PDF with size chart and tips on LoveCrochet or Etsy
This post contains affiliate links

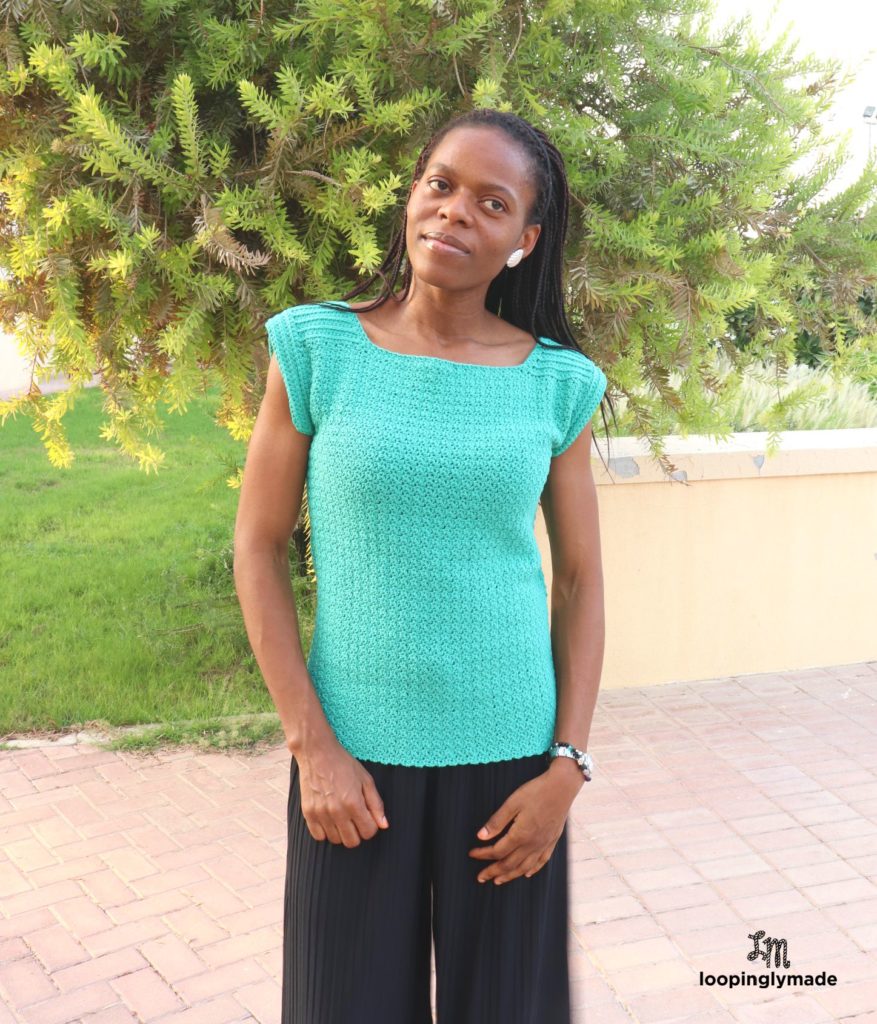
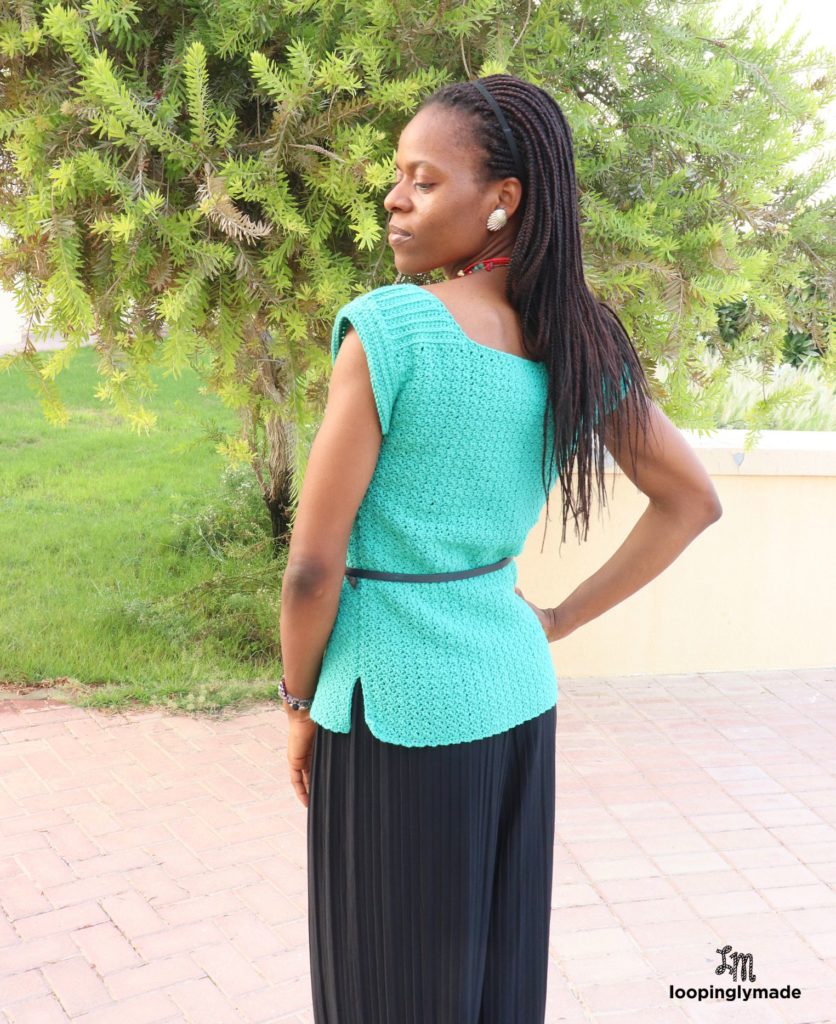
When I started designing this top, I had a clear picture on what it should look like, but as with many my designs, the picture changed midway. The bottom line was to create a simple, comfortable yet aesthetically pleasing piece.
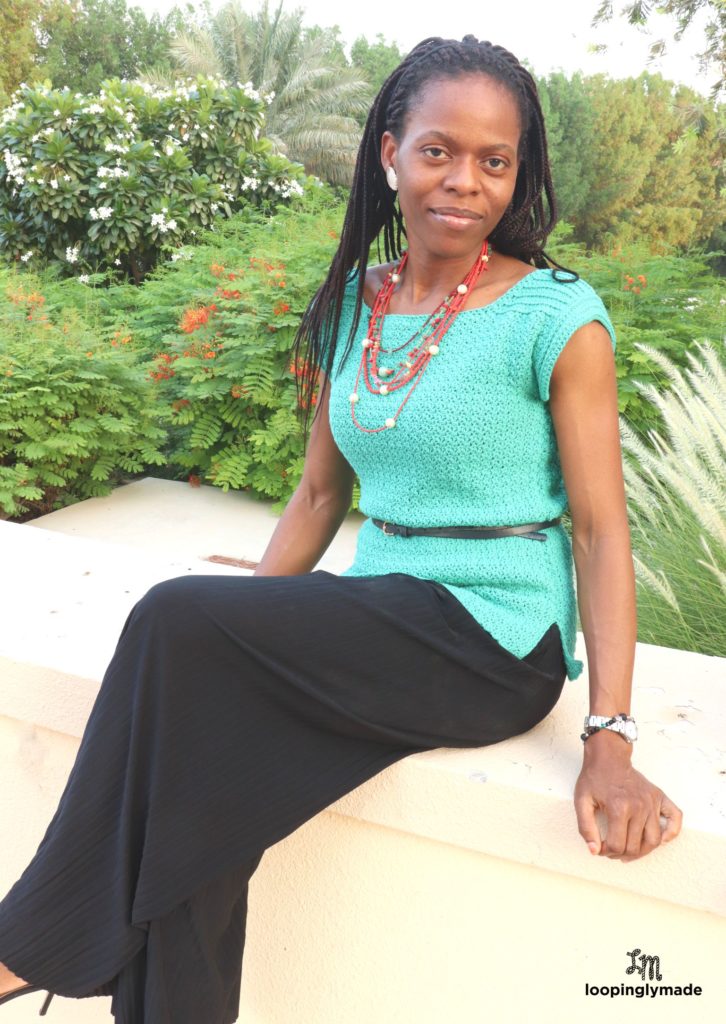
A piece that can be worn casually yet fashionably, that can be paired with accessories while still maintaining its style. And with this stitch tehnique, that wasn’t hard to accomplish.
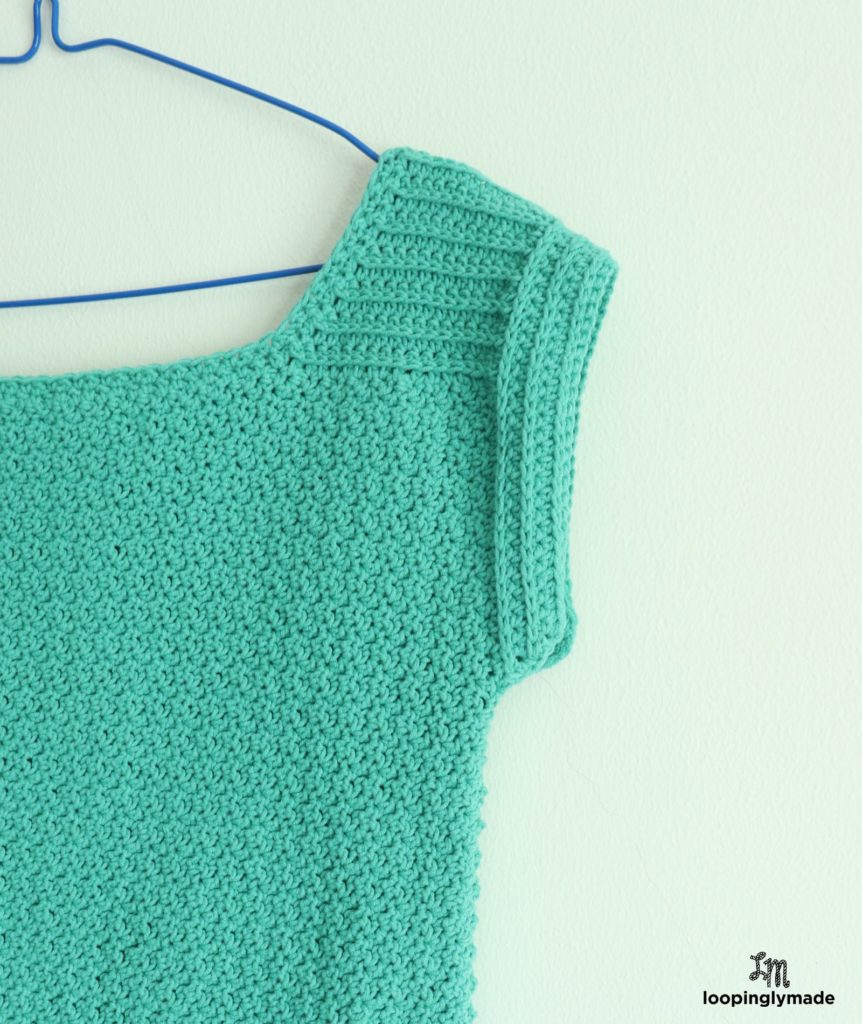
Making the body of the top is very basic, with the use of Double and Single crochet stitches you get the pretty texture this top is named after. The shoulder and sleeves use the Half Double and Single crochet stitches to achieve the ribbing.
The yarn used is Alize Cotton Gold solid, a perfect blend of cotton and acrylic yarn, and I believe this blend aided in making the stitch look pretty. The Dreamer Poncho is another clothing I made using this same yarn and same stitch technique. You can get the yarn here or check here for yarn substitutes.
I guarantee you won’t find this pretty stitch top hard to make. And there’s one for every size from extra small to 5xl. Let’s get to it!
It’s ok if you sell items you made using LM patterns. And I’d really love it if you mentioned it was from LM.
And please, do not sell or mass produce LM patterns- (the only exception is if you are donating the handmade items to charity)
Thanks. You can read more on LM policy here.
Finished Sizes(approx.): xs-5xl- bust/length
28-30/22″, 32-34/23″, 36-38/23″, 40-42/24.5″, 44-46/24.5″, 48-50/25.2″, 52-54/25.2″, 56-58/26.5″, 60-62/26.5″
You’ll need:Guage: 17 row x 16 sts across= 4×4
- Sport weight Yarn (3, 3, 3, 4, 4, 5, 5, 6, 6 balls). In this pattern, Alize Cotton Gold solids yarn in colour 610-jade (100g/3.53oz; 330 mtrs/361 yds). Get it here
- 4.5mm hook
- Tapestry needle
- Stitch marker
Stitches/Abbreviation
SC- single crochet
DC- double crochet
HDC- half double crochet
SC2tog- single crochet decrease
DC2tog- double crochet decrease
CH- chain
SL ST- slip stitch
BLO- back loop only
WS- wrong side (the back side of the ribbing)
RS- right side (the front side of the ribbing)
Notes:
- Pattern written in U.S terms
- Ch 1 does not count as a stitch
- The sizing is for XS-5XL in this sequence (XS, S, M, L, 1XL, 2XL,3XL, 4XL, 5XL)
Add this pattern to your Ravelry queue here
Save this pattern to Pinterest here
Get an AD Free PDF with size chart and tips LoveCrochet or Etsy
Pretty Stitch Crochet Top- Free Pattern
Body and Shoulder– make 2
Chain 81, 83, 83, 87, 87, 89, 89, 91, 91
Row 1: DC in 3rd ch from hook, *SC in next, DC in next. repeat from * across. Ch 1, turn.
Row 2: (SC in next, DC in next) repeat across. Ch 1, turn.
Row 3: (DC in next, SC in next) repeat across. Ch 1, turn
Rows 4- 62, 64, 70, 74, 74, 76, 76, 80, 80, repeat rows 2 and 3. DO NOT break yarn. Proceed to make the shoulder
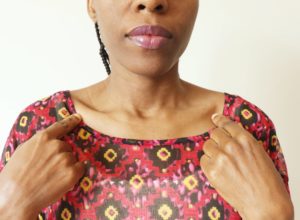
I need your help here! With your fabric held up at your collarbone, measure your neckline as shown in the photo below- be sure to centralise the fabric. Place stitch markers in stitch just at the end of collarbone (where I’m pointing)
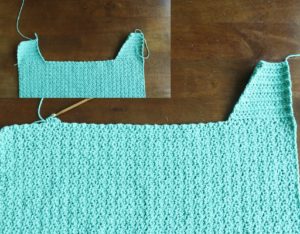
Note: for the shoulder, the first part is 2 sts taller than the second part.
First part of the Shoulder
Row 1: Ch 1, HDC in same stitch, HDC across (to the point of stitch marker). Ch 1, turn
Row 2: in BLO, SC2tog, SC across (up to the 1st HDC). ch1 turn
Row 3: HDC across. ch 1, turn
Row 4: in BLO, SC2tog, SC across. Ch 1, turn
Rows 5- 12, 14, 14, 16, 16, 18, 18, 20, 20, repeat rows 3 and 4. Break yarn
Second part of the Shoulder
Row 1: Attach yarn in stitch, Ch1, HDC in same st, HDC across. ch 1, turn
Row 2: in BLO SC across till last 2 sts, SC2tog. Ch 1, turn
Row 3: HDC across. Ch 1, turn
Row 4: in BLO, SC across till last 2 sts, SC2tog. Ch 1, turn
Rows 5- 10, 12, 12, 14, 14, 16, 16, 18, 18, repeat rows 3 and 4. Leave a considerably long tail to seam the shoulder.
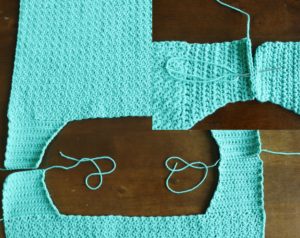
With WS facing up, seam the shoulder by going under both loops back and forth, tie tails together, break yarn.
Edging the Neckline
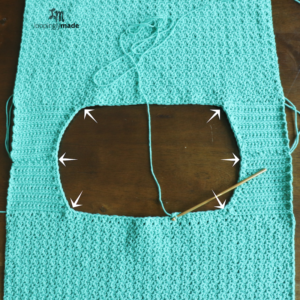
Note: In the photo, the arrows point to where you will be making decreases.
With RS facing up
Round 1: attach yarn in any of the (4) corners, Ch 1, DC2tog, (SC in next, DC in next) repeat to the next corner. decrease, repeat ( ) to center of seam (shoulder), decrease, repeat ( ) to the next corner, decrease, repeat ( ) to the last corner, decrease, repeat ( ) to center of seam, decrease, repeat ( ) to the last stitch. DO NOT join, place stitch marker in last st
Round 2: Decrease in next 2 sts, repeat round 1 around to the last stitch where you have your marker. Join to 1st st.
To have a closer neckline repeat the Round 1-2 more times.
Seaming the sides
Before seaming the sides, measure armhole, place stitch markers as follows for each size:
7, 7.5, 8, 8.5, 9, 9.5, 10, 10.5, 11
With WS facing out, start at the bottom from the 11th stitch and sew all the way to the armhole marker. Leave stitch marker on.
Sleeves
Note:
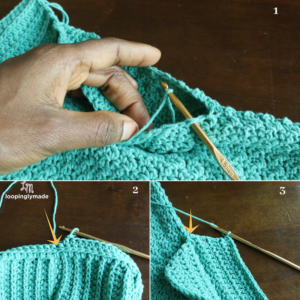
The arrow on photo 2 points to the seam where the decrease will be made- make decrease right in the middle of the seam.
While the one on photo 3 will be made in the stitches with the stitch marker (unfortunately, stitch marker was taken out before the shot).
Tip: to decrease on row 3, use the decrease from row 1 to gauge the stitches to work into. Applies to row 5 as well.
With RS facing out, join yarn in 1st st,
Row 1: Ch 1, HDC across to the center of seam, HDC2tog, HDC across. Ch 1, turn
Row 2: in BLO SC2tog, SC across till last 2 sts, SC2tog.
Row 3: HDC across to center of seam, HDC2tog, HDC across. Ch 1, turn
Row 4: in BLO SC2tog, SC across till last 2 sts, SC2tog. Ch1, turn
Rows 5-6: repeat rows 3 and 4, continue to the sides,
SC 6, SC2tog, SC 6. Break yarn, tie tails, weave them in.
And there you have your Pretty Stitch Crochet Top. Was that not fairly easy?
As always, when you make one I’d love to see it. You can tag me on Instagram with #loopinglym or share in our Private Facebook Group and let’s all admire your handwork.

Looking forward to try this, wish me luck..I can do ok on simple things but every time I try a sweater or top, it comes out whop-sided…wish me luck!
I’m wishing you the best and I truly hope you nail this one. If you need any help along the way, please don’t hesitate to ask via email.
Thank you for stopping by and sharing.
Working on this one now. Row one…ch 1 and turn at the end?
Also, when you go from row 2 to 3 does the sc go into the DC below and vice versa or does it matter?
Yes and Yes, you’re abslutley right. Chain 1, turn at the end of Row 1 and the SC goes into the DC and vice versa.
It does matter because that is how the stith definition comes about.
Thank you for this pattern. It is simple yet elegant.
Thank you Dr. Barbara. I’m glad you find it so.
really pretty …hope to make it soon
Thank you! I hope you do, and I’d love to see yours.
Beautiful!
Thank you.
Hello, was wondering what you mean by first part of the shoulder and second part of the shoulder? Is the first part the front piece and the second part, the back piece ?
Hello Janet, Yes, that’s what I meant. Is there anything else you need help with?
At the beginning you have row 1-3 which I understand but then you have row 4-64 etc,etc
With no explanation. Do we repeat rows 3&4?
I am so very sorry I missed adding that. Yes, repeat rows 2 and 3 till the required number of rows. Thank you for pointing that out.
Working on this one now. Row one…ch 1 and turn at the end?
Also, when you go from row 2 to 3 does the sc go into the DC below and vice versa or does it matter?
Dear Rose,
Beautiful pattern! I love be the style, the stitch (lemon peel?), and it looks simple to make.
Can’t wait to give it a try….of course, then my daughter will want one, ‘cause she likes pretty much the same stuff I do! I see two of these sweaters in my very near future lol..
Thank you for helping me with my “Christmas Shopping”…Jess (not the Jess in Colorado who also has beautiful designs – I’m Senior Jess from Michigan…
I’m so glad I was able to help with that. And yes, I would not have mistaken you for someone else. Thank you so much for stopping by and sharing your thoughts.