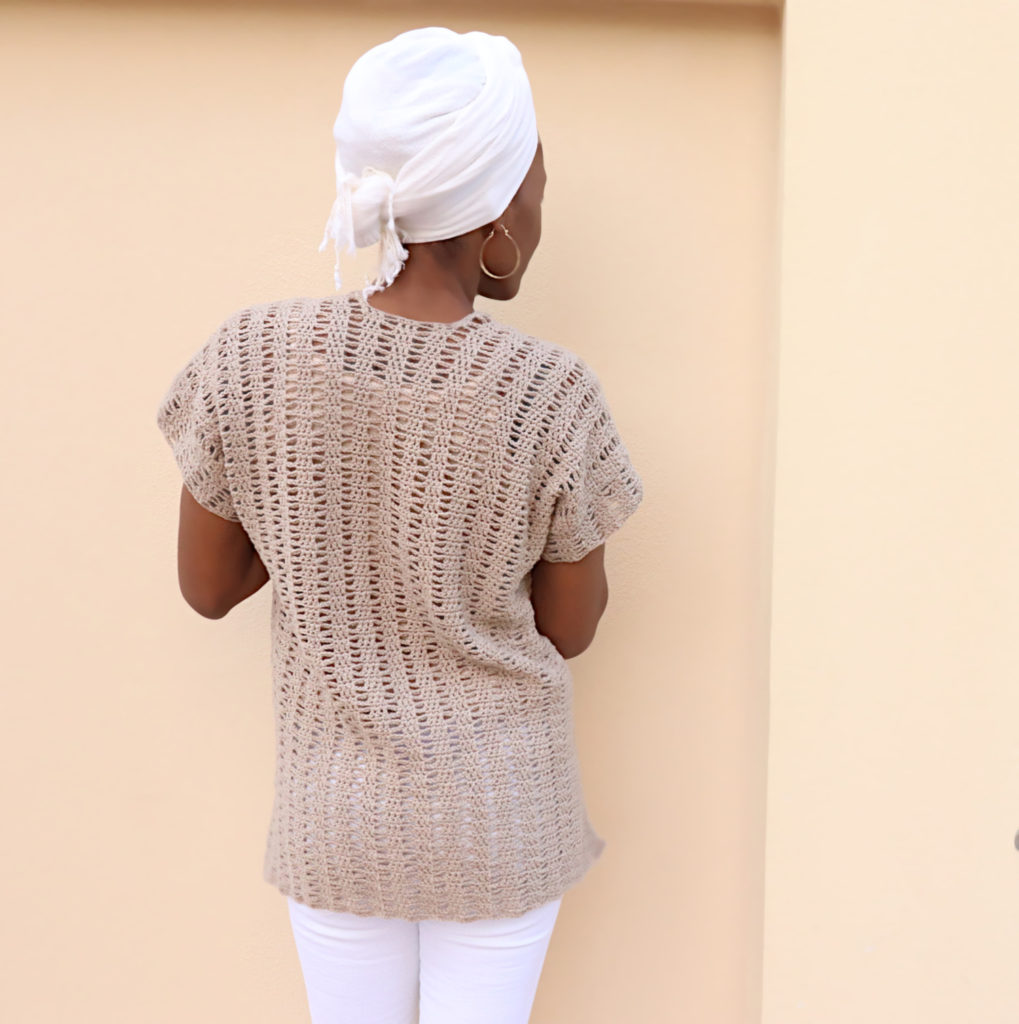
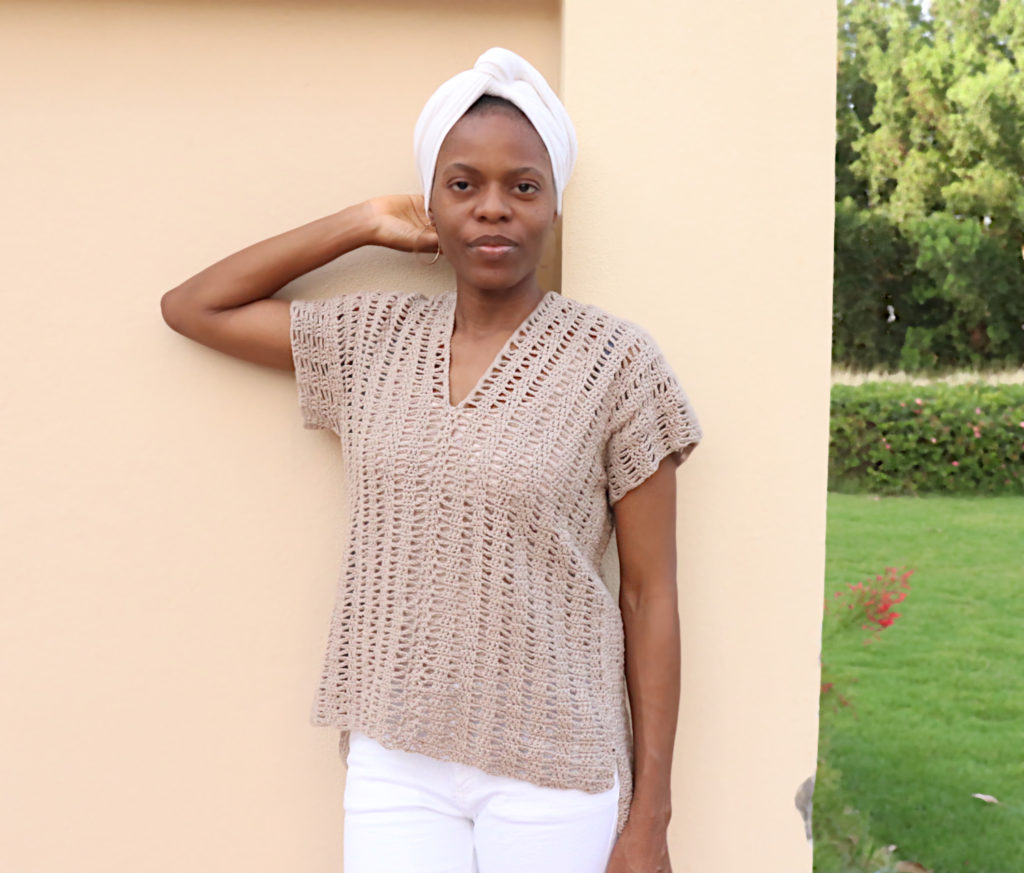
I loved desgining this Open Waves Top. It is the perfect mix of casual and informal wear.
Purchase an AD Free version on Etsy or Loveknitting
Disclosure- this post contains affiliate links
There is much to love about the Open Waves Top- it is an easy design to create, with an equally easy, repetitive stitch pattern. It is a pretty, flattering piece that drapes comfortably on your body.
For someone like me who is quite self-consious of their body, this top provides a modest way to wear something ‘open’ in the summer heat without me feeling exposed (does that make any sense to you?). Did I also mention it was comfortable yet? It really is.
The construction of the Open Waves Top is quite simple. You make the back first then the two front panels. Join the panels at the sides then make the arms.
This tunic is easily customisable. Say you want to use a DK or Worsted weight yarn, you only need to make the back as wide and long enough as you please, then follow the directions on making the front panels, armholes, then seaming.
Check on the Open Waves stitch pattern to familiarise yourself with the stitch multiples.
Yarn
Depending on the yarn you use for this pattern, you may or may not need to block. For best fittings though, and because the stitch design is stretchy (due to the chains), you should block your top. I’ve found blocking to be AMAZING!
For this pattern, I used Sport weight yarn; the same yarn used for the Pretty Stitch Top pattern I made a while back, Alize Cotton Gold solids. It is a superb blend of cotton (55%) and acrylic (45%) fibers, which makes for a yarn that has the right amount of stretch, studiness and softness.
It’s ok if you sell items you made using LM patterns. And I’d really love it if you mentioned it was from LM.
And please, do not sell or mass produce LM patterns- (the ONLY exception is if you are donating the handmade items to charity)
Thanks. You can read more on LM policy here.
Open Waves Top- Free Crochet Pattern for Women
Purchase an AD Free version on Etsy or Loveknitting
Save this pattern on Pinterest here
Add this pattern to your Ravelry queue here
Model in the photos is wearing small size and is designed to be loose fitting. So, this pattern is written for small size. The numbers represented below are in ascending order from XS to 4XL.
To fit
XS | S | M | L | 1XL | 2XL | 3XL | 4XL | |
Bust (in) | 28-30 | 32-34 | 36-38 | 40-42 | 44-46 | 48-50 | 52-54 | 56-58 |
- starting chains- 84, 94, 104, 104, 114, 124, 124, 134
- No. of Rows for back- 81, 87, 93, 95, 99, 103, 105, 109
- No. of Rows for front- 71, 77, 83, 85, 89, 93, 95, 99
- Armhole length- 7.5, 8, 8.5, 8.5, 9, 9.5, 9.5, 10
Gauge
I figured a visual gauge is easier to explain.
You’ll need
- 3 balls sport weight yarn (In this pattern, Alize Cotton Gold solids; 100gr, 329 mtr/360 yds). For a substitute, try Premier Yarns Cotton Fair solids (they have the same fiber content and are the same weight.)
(Number of balls for each size- 3, 3, 3, 4, 4, 5, 5, 6)
- 4.5mm hook
- Stitch markers
- Tapestry Needle
Stitches/Abbreviation
- SC- single crochet
- SC2TOG- single crochet 2 together
- DC- double crochet
- HDC- half double crochet
- CH- chain
- ST- stitch
Notes:
- Pattern is written in U.S terms
- Chain 1 at the beginning and end of rows do not count as stitches.
- Chain 1 in between stitches counts as a stitch
Back
Row 1: Chain 94. SC in 2nd chain from hook and in next 2 chains *Ch 3, skp 2 chs, DC in 3 chs, Ch 3, skp 2 chs, SC in 3 chs. Repeat from * across. Chain 1, turn
Row 2: DC in 3 sts, *ch 3, skp 3 chains, SC in 3 sts. Ch 3, skp 3 chs, DC in 3 sts. Repeat from * across. Chain 1, turn.
Row 3: SC in 3 sts, *ch 3, skp 3 chains, DC in 3 sts. Ch 3, skp 3 chs, SC in 3 sts. Repeat from * across. Chain 1, turn
Rows 4-87: repeat rows 2&3. DO NOT break yarn continue to the next row.
Front
Divide the back panel in two halves with 3 rows of solid stitches in between them. (See where arrows point in photo)
Right side
Row 88: repeat row 2, STOP when you have 3 rows of solid stitches in the middle. Chain 3, 1 DC in next st. Ch 1, turn
Row 89: SC in 1st st, *ch 3, skp 3 chains, DC in 3 sts. Ch 3, skp 3 chains, SC in 3 sts. Repeat from * across. Chain 1, turn
Row 90: DC in 3 sts, *ch3, skp 3 chains, SC in 3 sts. Ch 3, skp 3 chains, DC in 3 sts. Repeat from * across ending with DC in last st. Ch 1, turn
Rows 91-164: repeat rows 89 & 90. Snip yarn with long enough tail to weave in
Left Side- here, Chain 5 stands for 3 chains in between the solid stitches and 2 chains stand as 1 DC
Row 88: Join yarn in 3rd stitch. DC in same stitch, *ch 3, SC in next 3sts, ch 3, skp 3 chains, DC in 3 sts. Repeat from * across. Chain 1, turn
Row 89: SC in 3 sts, *ch 3, skp 3 chains, DC in 3 sts. Ch 3, skp 3 chains, SC in 3 sts. Repeat from * across ending with SC in last st. Turn
Row 90: Chain 5, *skp 3 chains, SC in 3 sts. Ch 3, skp 3 chains, DC in 3 sts, ch 3. Repeat from * across ending with DC in 3 sts. Chain 1, turn
91: SC in 3 sts, *ch 3, skp 3 chains, DC in 3 sts. Ch 3, skp 3 chains, SC in 3 sts. Repeat from * across ending with SC in top of Ch 2. Turn
Rows 92-163: repeat rows 90 & 91.
Row 164: Chain 5, *skp 3 chains, SC in 3 sts. Ch 3, skp 3 chains, DC in 3 sts, ch 3. Repeat from * across ending with DC in 3 sts. DO NOT snip yarn
Now working on the sides of fabric
Chain 1 SC across the side- make 2SC in DC stitch, Ch 1 over SC stitch. Snip yarn.
Make SC across on the other side as well.
Seaming the sides
this pattern uses the Overcast Stitch seam technique. This way, you seam in a circular manner through both loops of the stitch.
Fold fabric in half. The wrong side of the SCs you just made at the sides should be facing out- this is the Right Side of your work.
Measure armhole according to suggested sizing BUT ensure the stitches around the armhole can be divided by 3 (remember, the chain 1 is also a stitch). Mark you armholes with stitch markers.
Ensure that the back of your fabric is longer by 10 rows, then 5 rows for the open sides for both the back and front. Seam from the wrong side- bottom up to armhole.
Armhole
With Right Side facing out and starting from the last 2 seamed stitches in your seam:
Round 1: SC2together in last 2 stitches of seam, *ch 3, skp 3 sts, DC in 3 sts. Ch 3, skp 3 sts, SC in 3 sts. Repeat from * around. Join in 1st st.
Round 2: Ch 1, DC in 1st st, ch 3, skp ch 3, SC in 3 sts. Ch 3, skp ch 3, DC in 3 sts. Repeat from * around. Join to 1st st.
Round 3: Ch 1, 2SC in 1st st, ch 3, skp ch 3, DC in 3 sts. Ch 3, skp ch 3, SC in 3 sts. Repeat from * around. Join to 1st st.
Rounds 4-6: repeat rounds 2 & 3
Round 7: repeat round 3. Stop at the last set of Stitches when you are almost at the shoulder (we will be decreasing here) Do Not chain 3, DC in next 3 sts, Do Not chain 3, SC in next 3 sts. Continue to repeat round 3 till the end. Join to 1st st. snip yarn, weave in tails.
You can increase the number of rounds to your desired arm length, just ensure that you do the decrease ONLY on the last round.
Repeat Rounds 1-7 for the second arm.
Closing the Front
Ensure there are equal number of rows on each side before placing stitch marker at the joining spot. Armhole length shoudl align with joining point.
Now, starting from the bottom (in the direction of arrow) join yarn in stitch, Ch 1 make *2HDCs in DC st, chain 1 over SC st. Repeat from * up to the stitch marker point.
From there make 2SC in DC st, chain 1 over SC st. up to the back of the neck. (refer to photo for a visual guide). Make 2DC in next sts, Ch 3, 3SC in next sts, Ch 3, 2DC in next sts.
Continue to make 2SC in DC (in this case, chain 2), Ch 1 over SC to the other side of the stitch marker. Switch to making HDCs and chain 1 across. Leave long enough tail to join the front.
Seaming the Panels
Tip- seam through the loops of the chain 1 space and not in the spaces.
With fabric on the wrong side, seam the right and left panels to the point of stitch marker with the same overcast stitch technique.
Snip yarn, weave in all tails! Block your top.
SHARE
And your Open Waves Top is ready. I hope you enjoy wearing this piece. Also feel free to share this pattern with others. Thank you!
Vicki Zeimen says
This would make a beautiful swimsuit coverup by making it longer and leaving the front open. Can’t wait to make this top
Anuja Patkar says
I’ve completed the back, but I’m a bit confused about the front. Row 88 (right side) is a repetition of row 2 up to the stitch marker, but row 89 starts with a sc on top of the one last dc from the previous round, and when we chain 3 and skip the next 3 chains, the 3 dcs are on top of the 3 dcs from the previous row, so starting from here, the pattern completely changes, and doesn’t look right. Am I doing something wrong? Please help! I’m making this in red and hoping to finish before Xmas.
Amanda says
Love the finished Product, The fit looks great.. So.. I’m new to crochet and struggle following written patterns.. I don’t suppose you have a you tube channel do you where you show this pattern?
Rose says
Hi, thank you. At the moment, there is no video tutorial for this pattern.
Kathy says
Think I just found my new summer project! Cute pattern! Thank you!
Rose says
I’m sure glad you found it.
D says
I really like being able to make a longer sleeve. Great pattern, lovely model!
Rose says
You should make more rounds on the sleeves then.
Pam says
Thank you for this beautiful pattern. I love the loose fitting style. You write such clear instructions for your patterns. So happy to find your blog via Pinterest.
Rose says
I am so happy to hear that, and hope you enjoy making and wearing it. Thank you.
Debbie Caldwell says
What a pretty design! Thank you!
Rose says
Thank you! Glad to share it.
Wânia says
I loved!
Rose says
Thank you.
Jennifer says
Beautiful pattern and the model shows it off so well
Rose says
Ah, thank you Jennifer.
Emina says
Hello and thank you for the beautiful pattern. FYI – when I tried to subscribe to your newsletter I get error message. I hope it will be fixed. Thanks again for this pretty pattern
Rose says
Thank you for bringing that to my notice.
Michelle says
Thank you again for this. I am also very self conscious of my body because I am so twisted and bent up. I feel much better with a cover up over my shirts.
Rose says
Thank you for sharing that. It can’t be easy being different, but that’swhat makes you unique.
Linda Roberts says
Thank you so much for sharing this pattern. I too, love open weave but am concerned about showing what should be hidden. I love the fact that it is longer in the back as well as I have always been self conscious about me. Thank you again and God Bless you.
Rose says
I am most glad to not feel alone about being self-conscious, and thank you sharing that. It is amazing to me to be able to create something someone will find useful, and like as much as I do. Amen!