
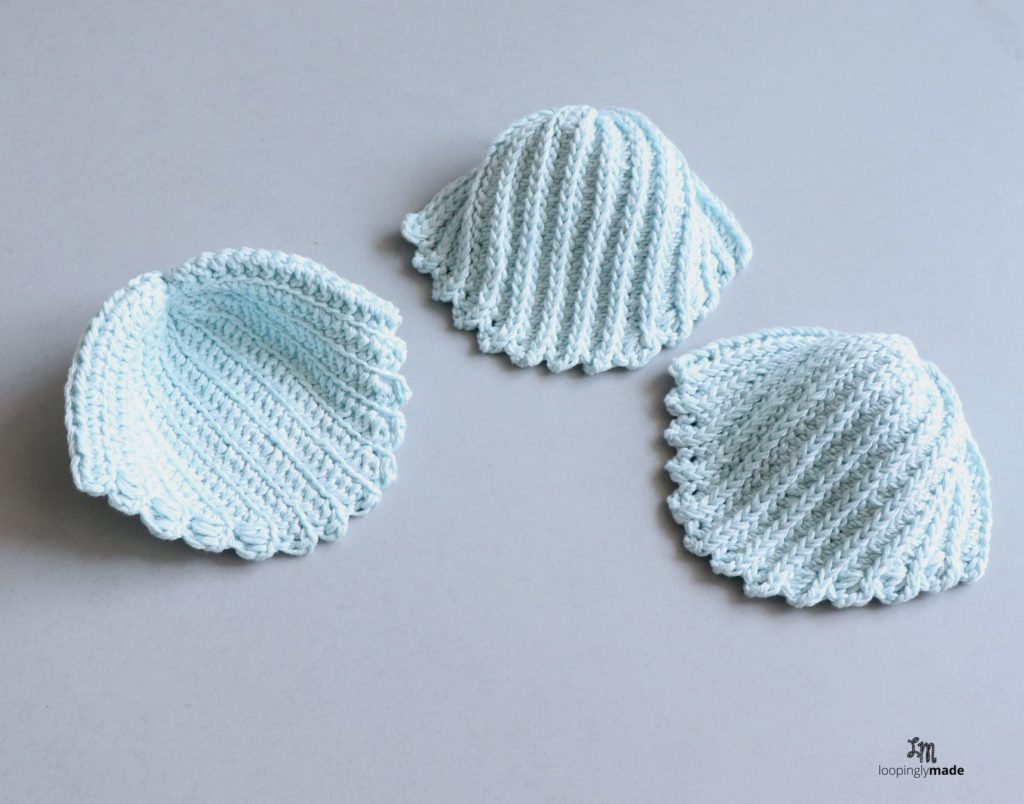
It’s still summer, and therefore beach season. Honestly though, I wasn’t thinking about the beach when I made these Easy Sea Shell Coasters. I just wanted to make something different.
You can get a PDF of this pattern on Etsy or LoveCrafts
These days, as I work from my computer, I tend to have a filled cup nearby, so I was looking for the very first coasters I made a while back but could not remember what I did with or where I kept them.
Thank God for the ‘super power’ of crocheting (have you seen that meme?), I decided to make new ones. So even though I wasn’t thinking about the beach when I got to making these, the summer heat must’ve subconsiously led me to create something from the water/sea. Even so, you can have fun with these Sea Shell Coasters when you go collecting sea shells with your young ones. Wait! have you seen this sea shell collector bag from Dream a Little Bigger? So cute!
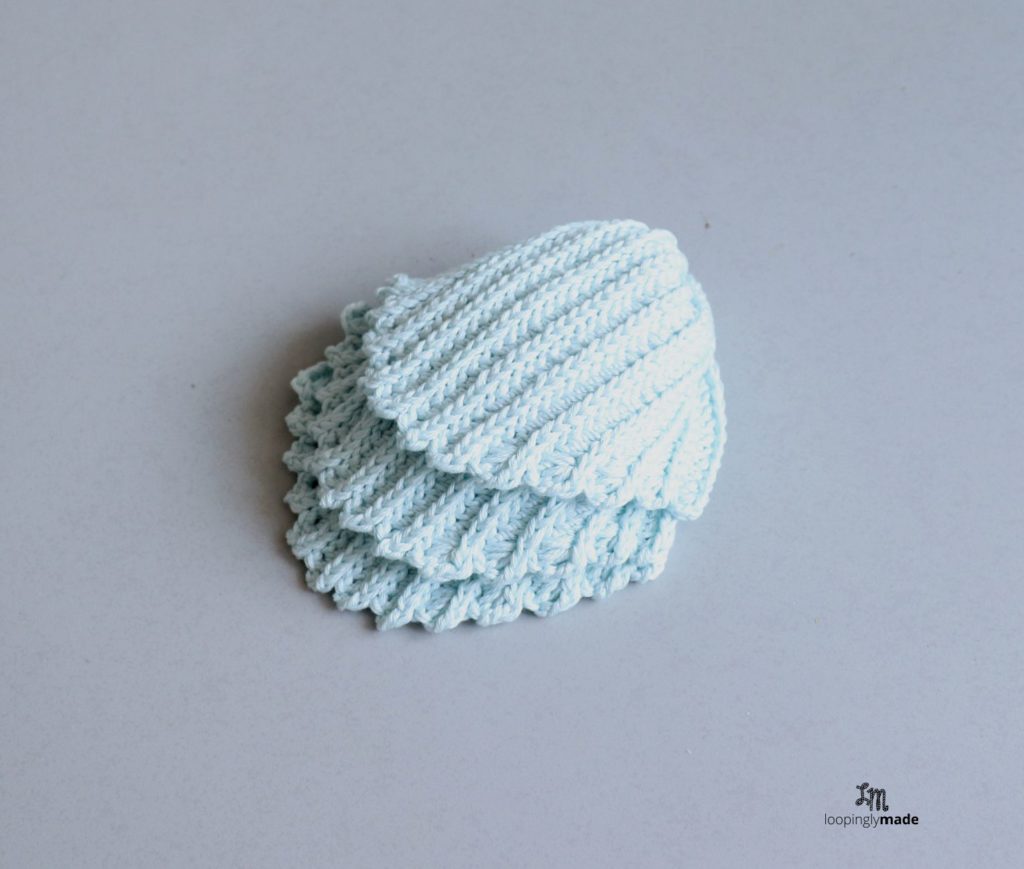
This Sea Shell Coaster is worked in rows and in one piece. I particularly love how it fans out to create the clam sea shell shape. I hope you enjoy making these as I did.
It is ok if you sell items you made using Craft-Her patterns. And I’d really love it if you mentioned it was from Craft-Her. And please, do not sell or mass produce Craft-Her patterns- (the only exception is if you are donating the handmade items to charity). Thank you. Read more on Craft-Her policy here
Thanks. You can read more on Craft-Her policy here.
Save Pattern to Pinterest
You can get a PDF of this pattern on Etsy or LoveCrafts
Notes:
- Pattern written in U.S terms
- Always remember to carry the tail from the magic circle along, as you will be needing it in the end to pull the circle closed
- Take note to make your slip stitches a bit loose (not too loose though)
- All stitches are worked in the FLO
You’ll need:
- Less than 50 gram, any worsted weight cotton yarn of choice
- 4.5mm hook
- Tapestry needle
Stitches/Abbreviation
- HDC- half double crochet
- CH- chain
- SL ST- slip stitch
- FLO- front loop only
- MC- magic circle
- HDC3tog- half double crochet decrease or half double crochet 3 together
lovely pattern!!! is there any way you can upscale this so it can be used as a bralette cup?
I suppose there is a way, you would want to know the cup size and circumference of the chest for whom you’re making for.
Hello!
First off I would like to say what a beautiful pattern it is! But I have to agree it is a bit confusing, and I’ve redone it a couple of times now and I stil don’t get it right. For me it’s the top part, with the chain 3. As I assume one is suppose to Sl st(in front loop) in the chained 3 from previous round,3ch, and then hdc 3 together. All in front loop. But I jsut don’t get the little hills /pointi parts on the top? It just gets straight and not 〰 on the top like the picture. Hope you understand what I mean!
Ok, I am going to make a video to help with this.
Hi.
I am also not getting the ridges on top…..
I’m working on a video. Please sign up for the newsletter so that you’ll be informed once it goes live. Thank you.
I find your instructions very confusing. Are we going into the chain stitch to get the extra stitches? And do we FLO into the slip stitch??? What do we do there? On row 4 and row 6 etc? Thank you for your help.
Oh, sorry you’re finding the pattern confusing. I did mention at the beginning of the pattern and in the notes to ‘remember to work in FLO’. The illustrative photo in the pattern also shows where to work into. So, yes you will be working in FLO of the slip stitch. I’ll recommend working your slip stitches loose to make it easier to work into in the nxt row. Thank you for stopping by.
I’m getting a little confused with counting stitches, where the end of my half trebles separate never seem to look the same. Row 4, where it says to do 18 slips, makes my next row of half trebles start too high. Are you meant to do the first slip stitch of the slip stitch row in the last half treble of the previous row? Or in the slip stitch that you did in the magic circle? Many thanks
Hello Bethan, sorry you’re having trouble there. You’re meant to start the slip stitch in the last stitch (half treble in this case) of the previous row.
Hi rose,
Thank you for your response, I’ll keep trying until I get it right!
I hope you get it right.
Do you not work the ends of rows 10 thru 16 with a sl st in the magic circle? It is back in the directions at row 17. Just want to varify.
Hello Ruth, yes, you do. Thank you for pointing that out. I’m updating it now.
Hi! Just wanted to let you know row 22 should read 18 sts, and row 24 should read 16 sts!
Lovely pieces!
Hello, thank you so very much for pointing it out and stopping by. Correction made!