updated 7 June,2021.
I am amazed at how something awesome can be birthed from a dark place. This Classic Messy Bun Beanie crochet pattern came about when I was experiencing some frustration, you can read about it here.
Purchase a Printable PDF on Ravelry or Etsy
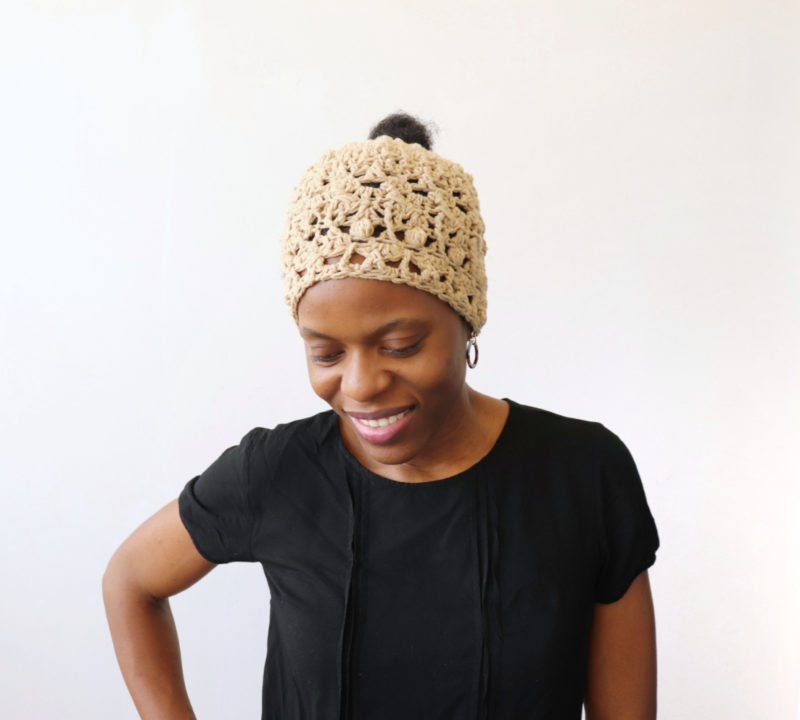
When I first started this messy bun beanie, it was an outlet for me. I left the project after the feelings passed and even though I really wanted to complete it, there was no further motivation to do so. However, as I began to get in tune with designing again I went back to it and here you have the completed design.
I cannot explain to how free I felt when I was designing this beanie. Yes, I followed some crochet rules, but for the most part I just let my feelings flow as I crafted this textured crochet messy bun beanie and I was pleasantly surprised by the result.
If I had sat down to think about how to create this design, trust me it would not have seen the light of day. I would doubt that I could create this kind of design, I would overthink it and in the end the project would not be done.
Purchase a Printable PDF on Ravelry or Etsy
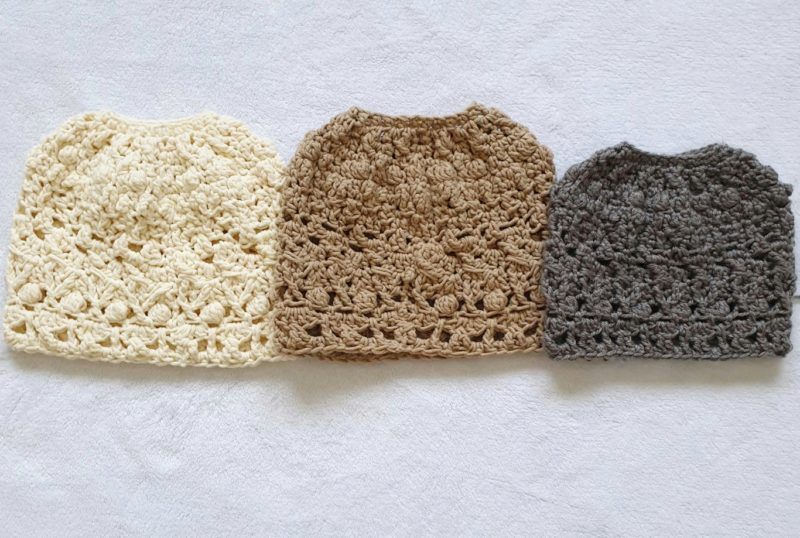
This is mainly a freestyle pattern as I just let my mind and hands flow with the stitches, but, as I mentioned above I did follow some rules to keep it structured. Otherwise, I would not have been able to write a pattern for it.
I encourage you to have an open mind as you work on this pattern. Pretend like there are no rules to follow and just let yourself create. You will not need to count stitches in this pattern. In fact, I tried to do so, but after the 4th round, I gave up. This is a freestyle after all.
Purchase a Printable PDF on Ravelry or Etsy
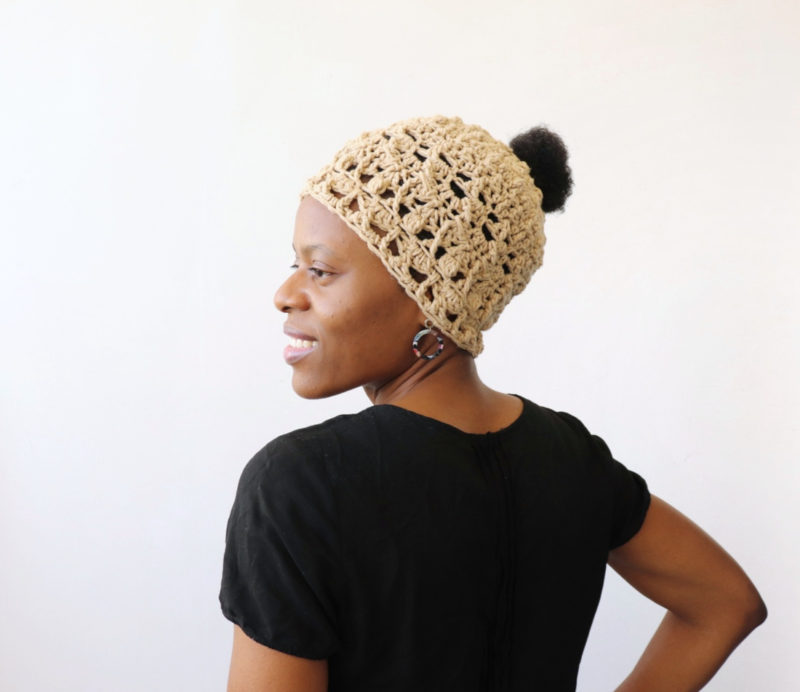
Though this design looks complex, it is pretty straightforward. It is an eclectic design and I encourage you to try it. So, if you love a good challenge, join me to make this beanie and share your version. I have included tips to guide you.
It is ok if you sell items you made using Craft-Her patterns. And I’d really love it if you mentioned it was from Craft-Her. And please, do not sell or mass produce Craft-Her patterns- (the only exception is if you are donating the handmade items to charity). Thank you. Read more on Craft-Her policy here
Thanks. You can read more on Craft-Her policy here.
Classic Messy Bun Beanie- Free Crochet Pattern
Gauge: radius (half the diameter) is around 2 inches by Round 5.
Sizing:
Finished length is about 7 inches to fit head circumference 20-22. If making for child with 20” head circumference, stop at Round 16.
Materials:
- 1 skein worsted weight, medium 4 yarn, specifically 9 wpi. This pattern uses Alize Cotton Gold Plus, 55% cotton/45% acrylic, 100g/3.53oz, 200mt/361yds. If you use a medium 4 yarn that is not up to the gauge, it will come out smaller (The grey beanie is also medium 4 but it turned out smaller)
- 5mm hook
- Needle to weave in ends
Abbreviation/Stitches:
- SC- single crochet
- HDC- half double crochet
- DC- double crochet
- TC- treble crochet
- FPDC- front post double crochet
- FPTC- front post triple crochet
- ST- stitch
- SL ST- slip stitch
- SKP- skip
- CH- chain
Special stitches:
- Crossed DC- Skip the required stitch, make DC in next, then go over and make DC in the skipped stitch
- Crossed TC- Repeat as for Crossed DC
- 4DC Bobble- Yarn over, go into stitch, yarn over and pull up a loop, yarn over and pull through first 2 loops (2 loops left on hook). Yarn over again, go into same stitch, yarn over, pull up a loop, yarn over and pull through first 2 loops (3 loops left on hook). Repeat till there are 5 loops on hook, yarn over and pull through all 5 loops.
- 5 DC Bobble- Repeat as for 4DC Bobble making an additional loop, so that you have 6 loops on hook, then yarn over and pull through all 6 loops.
- FPDC- yarn over, insert hook around the body of the stitch (not in stitch), by going from the front of the stitch- in from the right, and out from the other side of the stitch, yarn over, pull out a loop (3 loops now on hook), *yarn over and pull through 2 loops, repeat * 2 times
- FPTC-yarn over twice, insert hook around the body of the stitch (not in stitch), by going from the front of the stitch- in from the right, and out from the other side of the stitch, yarn over, pull out a loop (4 loops now on hook), *yarn over and pull through 2 loops, repeat * 3 times
Notes:
- Pattern is written in U.S terms
- This is a freestyle pattern. So, keep an open mind and follow pattern as directed
- Always place your stitch marker in the last stitch to help keep track
- The beginning (1st stitch) of the round is always where you join the round, unless otherwise stated
- Ch 1 in between stitches counts as a stitch, unless otherwise stated
Purchase a Printable PDF on Ravelry or Etsy
PATTERN
Chain 24, join to 1st chain.
Round 1: Ch 1, starting in same chain, HDC in each chain. Join to HDC.
Round 2: Ch 2, skp 1st st *DC and SC in next, TC in next, repeat from * around. Make last TC in slip stitch. Join to DC.
Round 3: Ch 1, *2HDC in same st, skp next st, FPDC around next, FPTC in skipped st, repeat from * around. Join to HDC.
Round 4: Ch 3, skp 1st st, *TC and HDC in next st, [SC, DC, SC] in next 3 sts. Repeat from * around. Make last SC in sl st. Join to TC.
Round 5: Ch 1, 2SC in same st, skp next st, DC in next, DC in skipped st (crossed DC), 4DC bobble in next. SC in next, crossed DC in next 2, 4DC Bobble in next, SC in next, TC in next. *2SC in nxt st, skp next st, DC in next, DC in skipped st (crossed DC), 4DC bobble in next. SC in next, crossed DC in next 2, 4DC Bobble in next, SC in next, TC in next repeat * around. Join to SC
Round 6: Ch 1, *HDC in same st, [Sl st, Ch 4, Sl st] in next st. HDC in next st, [Sl st, Ch 4, Sl st] in next st, repeat from * around. Join to HDC
Tip: For the next row, skip all the chain 4 spaces, work into only on of the Slip Stitches (the one on the right side of the Ch 4), and the HDC stitches
Round 7: Ch 3, TC in same st, DC in next, skip next slip st, HDC in next (HDC from previous row), SC in next (the slip st). *TC in same st, DC in next, skip next slip st, HDC in next, SC in next , repeat from * till last Ch 4 loop, end with TC in next, DC in next. Join to TC
Round 8: Ch 1, HDC in same st, BPDC around next, Crossed DC in next 2 sts. *HDC in next st, BPDC around next, Crossed DC in next 2 sts, repeat from * around. After the last crossed DC, end with HDC in next st, BPDC around next. Join to HDC
Round 9: Ch 2, FPDC around same st, HDC in next, BPDC around next (this will be done around one of the crossed DCs on round 8), HDC in next. *FPDC in next st, HDC in next, BPDC around next, HDC in next repeat from *around. Join to FPDC
Round 10: Ch 1, skip 1st st, SC in next, *Ch 1, skp next st, Crossed TC in next 2 sts, Ch 1, skp 1 st, SC in next, repeat from * around. Make last SC in Sl st. Join to SC
Purchase a Printable PDF on Ravelry or Etsy
Tip for next round: when making SC in next st (i.e, Ch 1 space), make it inside the chain not under it
Round 11: Ch 2, [DC, TC, HDC], *SC in next st, Ch 2, skip the crossed DCs, [DC, TC, HDC] in Ch 1 space, repeat from * around. End with Ch 2, SC in last Ch 1. Join to DC
Tip for next round: skip the SCs, skip the TCs in the middle too and work the post stitches around the 1st and 3rd stitches
Round 12: Ch 2, *skp 2 sts, FPDC around 3rd st, FPTC in 1st skipped st, [HDC, DC, HDC] in Ch 2 space, repeat * around. Join to top of Ch 2
Round 13: Ch 4, Sl st in same st, skip next st, DC in 3, DC in skipped st. *Sl st in next, Ch 4, Sl st in same st. skip next st, DC in 3, DC in skipped st, repeat from * around. End with Sl st in last st. Join in Sl st at beginning of round
Round 14: Ch 1, skip Ch 4 space *FPDC around next st, Ch 1, skp next st, HDC in next, skip next st, 3 DC in Ch 4 space, repeat from * around. End round with 3 DC in skipped Ch 4 space at the beginning of round. Join to FPDC
Tip for next round: work the FPTCs around the 1st DC and FPDCs from round 14, and work the 5DC bobbles in the center DC
Round 15: Ch 2, skp 3 sts, FPTC around next st, FPTC around 1st skipped st, 5DC Bobble in next, *Ch 1, skp 4 sts, FPTC in next, FPTC in 2nd skipped st, 5DC Bobble in next., repeat from * around. End round with Ch 1. Join to FPTC
Tip for next round: Make your HDCs in between each TC and Bobble stitch. (see photo below)
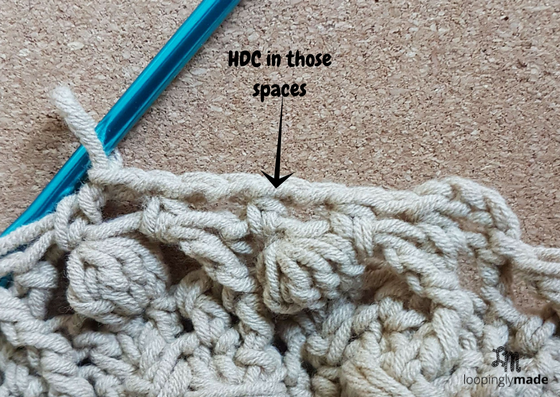
Round 16: Ch 2, HDC in space beside TC, *Ch 1, skip Crossed DC, HDC between TC and Bobble st, Ch1 HDC beside TC, repeat from *around. End with HDC beside Bobble st. Join to HDC. STOP HERE FOR CHILD SIZE AND IF YOU WANT THE BEANIE TO BE ABOVE THE EARS FOR ADULT SIZE. Will measure about 6 inches tall.
Round 17: 2DC in Ch 1 space, sl st in next. *4DC in next Ch 1 space, sl st in next Ch 1, repeat from * around. End with 2DC in the 1st st (same space where you made the first 2 DCs at the beginning of the round). Join to 1st DC
Tip for next round: make your Spike DC in the same st as Sl st from round 17
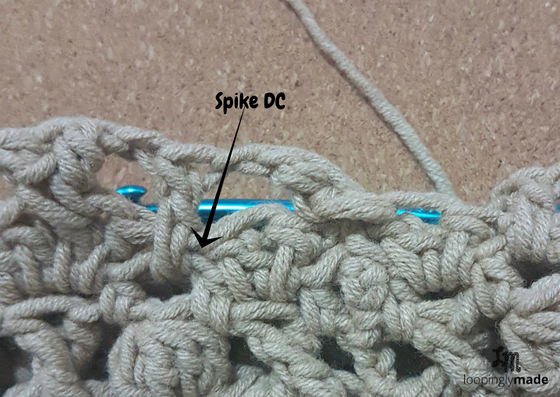
Round 18: Ch 1, TC in last st (last DC in round 17), Ch 1, skp next st, Spike DC in next. *Ch 1, skp 2 sts, TC in next, TC in 2nd skipped st, Ch 1, Spike DC in next, repeat from * till you’ve made the last Spike DC. TC in first st (1st DC in round 17). Join to TC
Round 19: *2HDC in Ch 1 space, FPDC around next (the spike DC), HDC in Ch 1 space, skip 2 sts (that is, the crossed TCs), repeat from * around. Join to 1st HDC
Purchase a Printable PDF on Ravelry or Etsy
Break yarn, weave in ends. Share your version with us in our Private Facebook group.
Thank you for checking out this pattern. Kindly use the SHARE buttons below to let other crochet and craft lovers know. Share your version with us in our Private Facebook group or with #craftherblog on Instagram. Thank you!

Boy did I mess this up.i have no idea where it even went wrong.its a hat but…above my ability to follow directions.thanks for sharing